 |
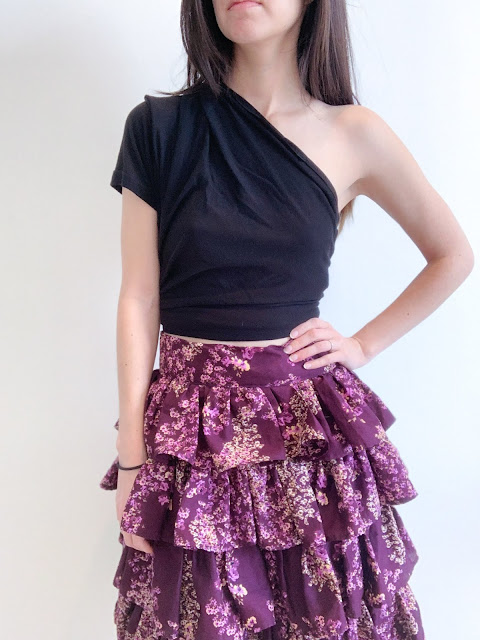
| I also whipped up this top out of some scrap fabric, but it has since been cut up for use in other projects. |
I'm pretty darn excited because I made this skirt ::pumps fist circularly and makes a wooing noise:: This is one of the first items I've tried to make where I didn't have a pattern and was basing it on a photo. This photo, in case you are wondering:
 |
| Ulla Johnson, RTW 2020 |
You'll notice that in the photo, the garment in question is a dress, whereas mine is a skirt. While the skirt came together in a relatively straightforward manner, that was not the case with the bodice. I tried to struggle through it before I figured the garment was trying to tell me something and I should stop banging my head against the wall turning what was apparently meant to be a skirt into a dress (plus, skirts are so versatile). I had purchased 5 meters of cloth, thinking that would be enough (it was not), so I barely had enough to make my first attempt at the bodice and nothing left for a do-over. Also (and I acknowledge that this is a bit of a false comparison) this skirt cost me about $20 in fabric (plus two days of my time) whereas the Ulla Johnson one is closer to $800. No doubt it is much better made and the fabric is probably nicer but still!
 |
| Shirt | American Giant Blazer | Theory Shoes | Lanvin (Nordstrom Rack!) |
I wasn't flying totally blind, I stumbled across this video by Coolripa, a talented DIY vlogger and used that to figure out the basics of what I needed to do. The most time consuming part of this was the ruffles. For each ruffle you have to sew it four times: (1) to hem the bottom, (2) to hem the top, (3) to put the gathering stitch in it (what allows you to make it into a ruffle) and (4) to attach it to the skirt. The fabric for shortest ruffle (top) is about 5 inches high by 9 feet long, and the length of fabric for the longest ruffle (bottom layer) is about 8 inches high and 12 feet long. Basically each tier is about a foot in length longer than its predecessor. I really wanted that full ruffly look and you achieve that by cutting something like 2.5 x 3 times the length that you would need to fit the ruffle around your body. (Also yes, I know I switched between the metric and imperial system for giving you measurement info in this post, but that is where I am right now).
Once it was all done came my favorite part, playing styling dress up.
 |
| Top | Secondhand from Rendezvous North Beach Hat | Nordstrom Rack Shoes | Target |
 |
| Jacket | Secondhand from Shop ReLove Bikini Top | J. Crew |
This project really left me feeling accomplished and pretty confident about my ruffle making capabilities. I can't wait to wear this out into the world.
Thanks for stopping by.

THIS SKIRT IS GREAT! I love how you really captured those layers and it looks identical.
ReplyDeleteThank you! I can't wait to tackle some more DIYs
DeleteI think this is one of my favorite pieces you've made, and like it as a skirt best. Also- factor in your billable rate and this might cost more than the original ;)
ReplyDeleteHaha fair. Good thing sewing hours are pro bono.
Delete